Setup Guide
Get your venue up and running with AxeScorer in minutes.
After purchasing your subscription you can create as many lanes as you've subscribed for. Each lane gets its own projected board and scoring tablet.
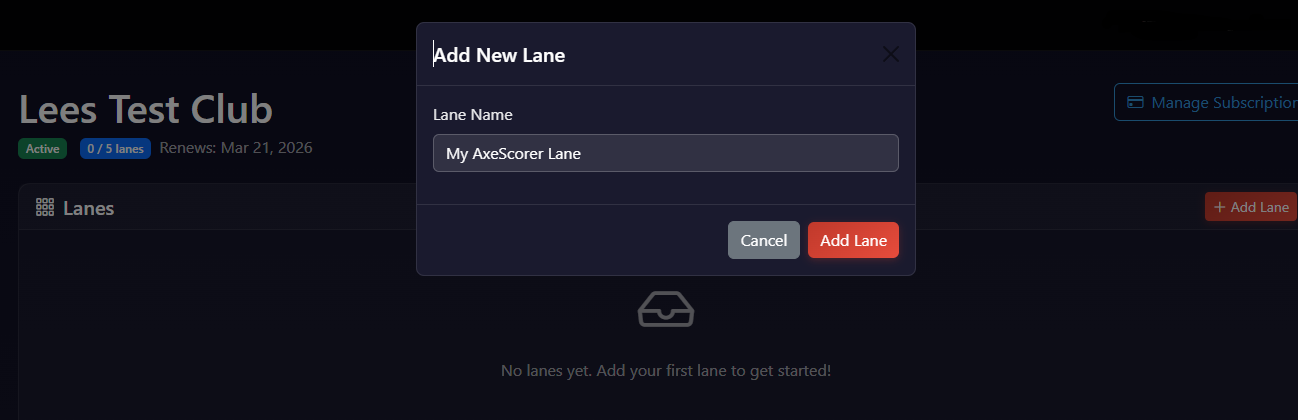
Create Your Lane
From your dashboard, click Add Lane and give it a name.
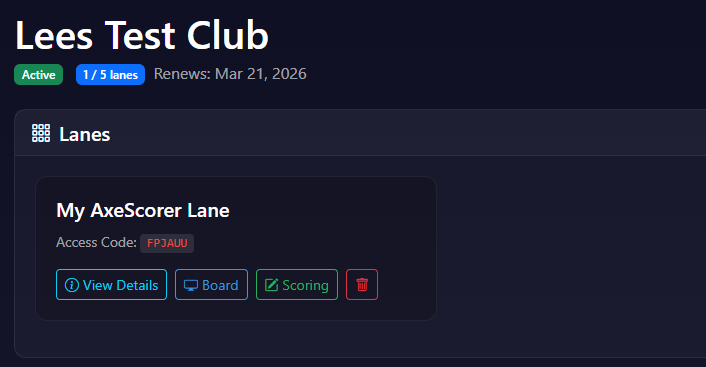
View Lane Details
Click on your new lane card to open the details. You'll see two URLs and a secret code.
Connect Your Devices
Open the Board URL on your projector's browser. Open the Scoring URL on your tablet.
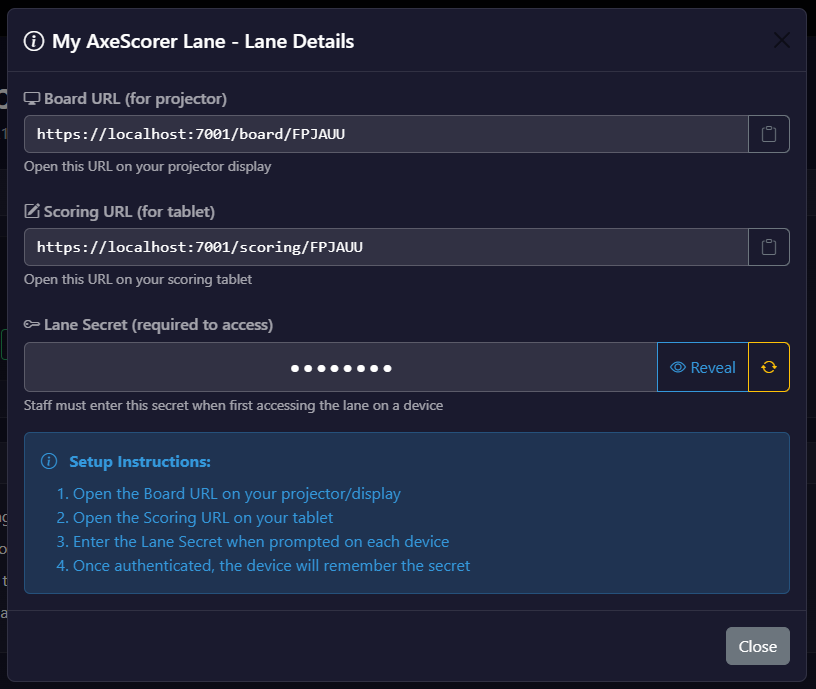
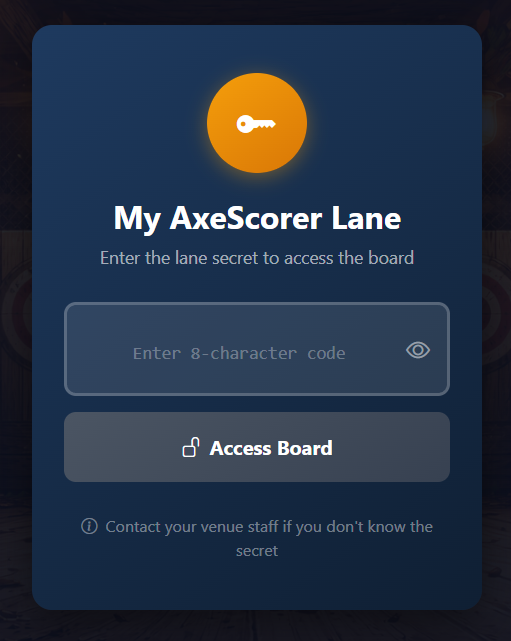
Enter the Secret
Both devices will ask for a secret code. Enter the code shown in your lane details. It's the same for both devices.
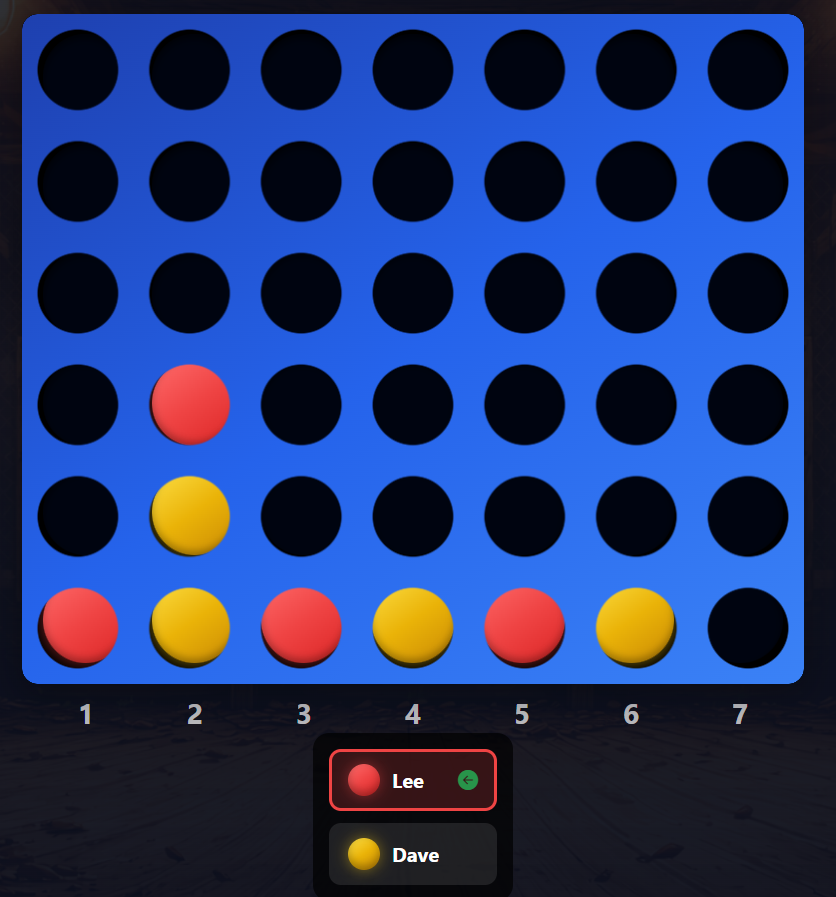
You're Connected
Both devices now show the game selection screen. The board and scoring tablet are linked in real time.

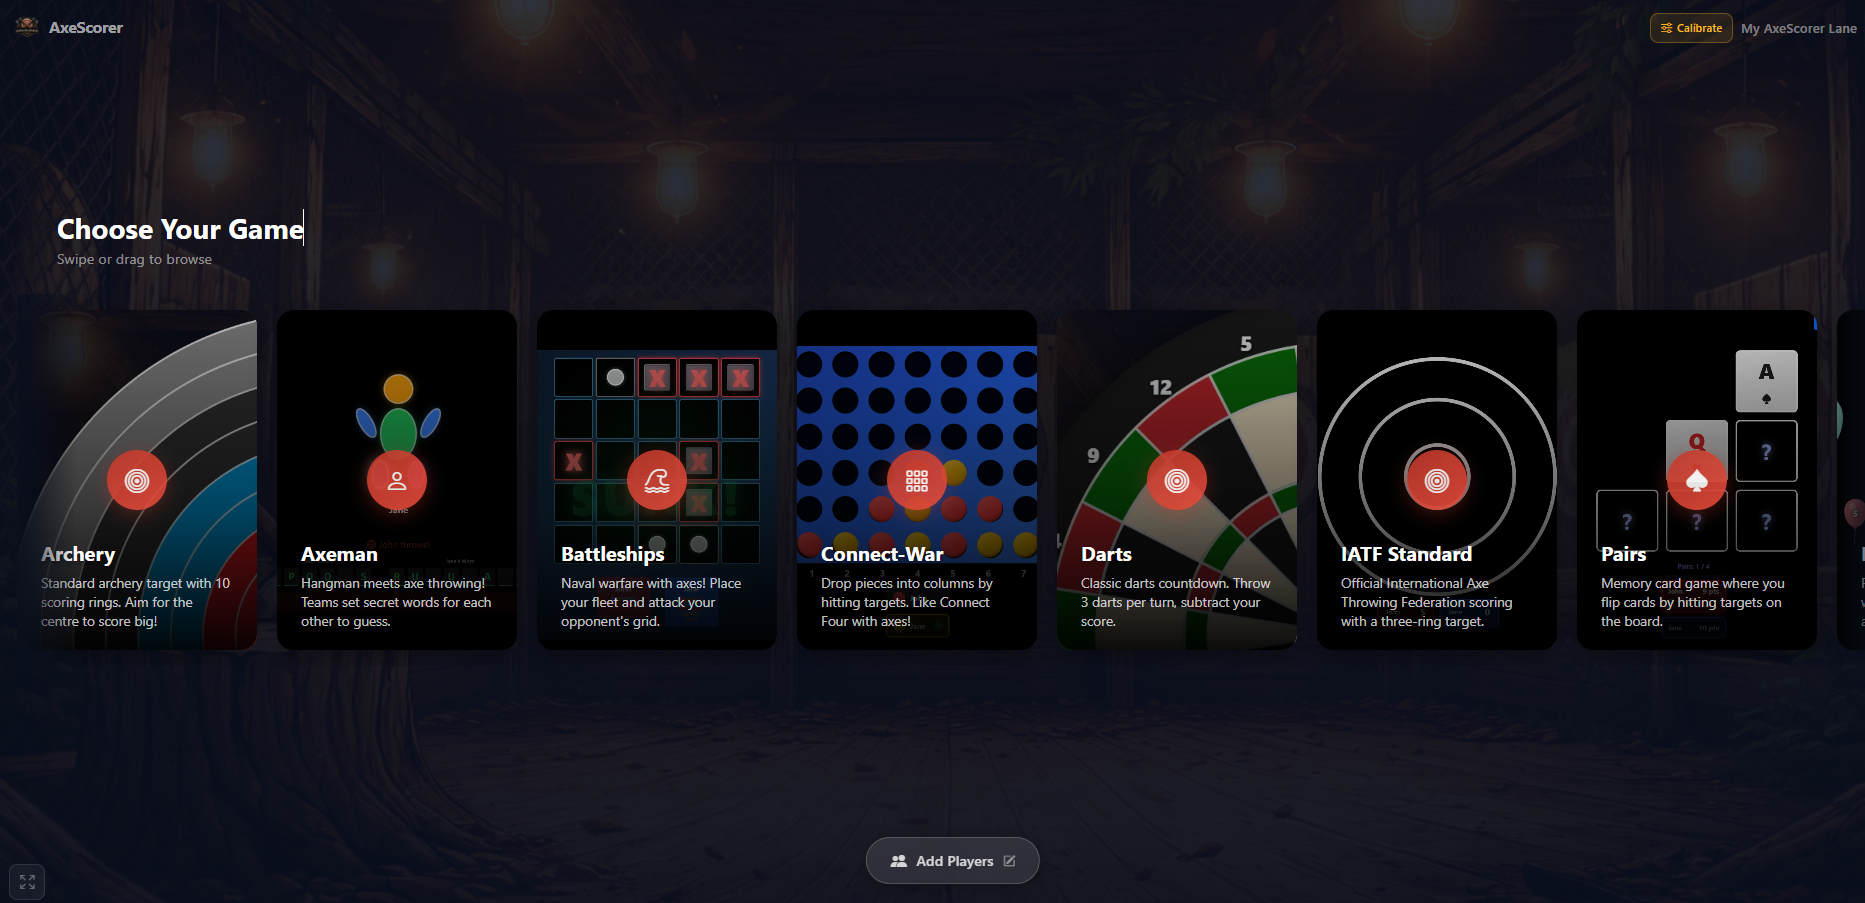
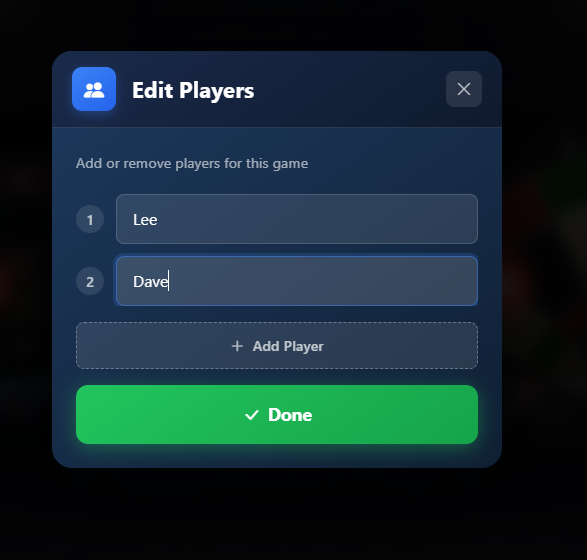
Add Players
Tap Add Players on the scoring tablet. Enter up to 10 player names. For 1-on-1 games, players are automatically assigned to red and blue teams.
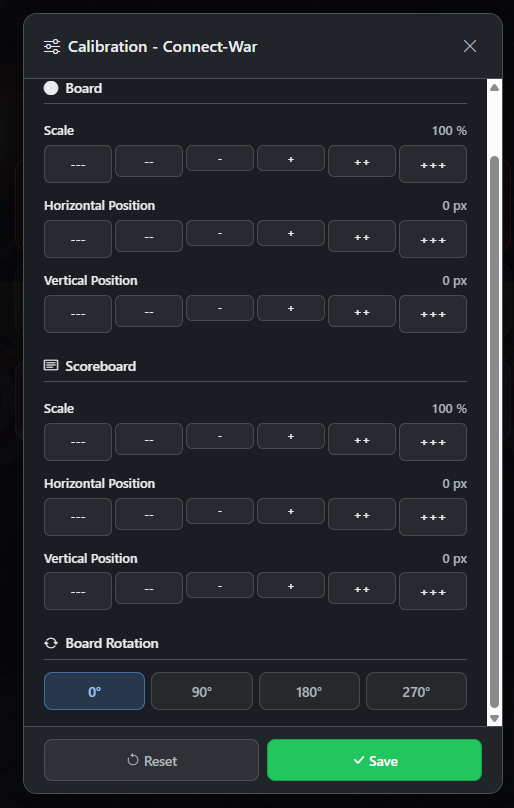
Calibrate Your Targets
If the projected target doesn't line up with your physical target, tap Calibrate in the top right. Adjust the position, size, and rotation for each game type. Calibration is saved per lane.
Accept online bookings and payments directly through your website. Powered by Stripe Connect and available in all EU/EEA countries, the UK, US, Canada, Australia, and more.
Enable Online Bookings
From your dashboard, click Online Bookings then Enable Bookings.
Connect Your Bank Account
Select your business country and click Connect Bank Account. Stripe will guide you through their secure onboarding to verify your identity and link your bank for payouts. If you select the wrong country, use "Cancel & Start Over" to begin again.
Create Session Types
Go to the Sessions tab. Create your session types, for example "Standard Session" or "Private Group". For each, set the duration, price (per person or per session), minimum group size, and maximum capacity.
Build Your Weekly Schedule
Still on the Sessions tab, add sessions to each day of the week. Pick the session type and start time. Your schedule repeats weekly. For holidays or closures, add date overrides.
Configure Settings
On the General tab, set your booking page URL, timezone, currency, lead time, and how far ahead customers can book. On Payments, add any tax rates. On Waivers, optionally enable digital waivers that are emailed to participants automatically.
Add to Your Website
Copy the iframe embed code from the General tab and paste it into your website. Or simply link directly to your hosted booking page URL. Customers can browse available sessions, book, and pay online.
Ready to Get Started?
Set up your venue in minutes. No proprietary hardware required.